12th April - The Tongariro Alpine Crossing - Part 2
Aurora_b
Mike and Liz Downing
Sat 23 Apr 2011 11:18
|
No excuses for more photos - this is the sort of thing
you only do once. No other day could ever be as perfect for doing the crossing
as this.
 The last climb. It's bit of a
slog, but at least its an easy path and it does finally lead
to
the summit of the crossing. This does have
steep drops on either side. Not good in high winds.
We
did have moderately strong winds
that were cold, but they weren't too bad.
 Up on the summit at last,
at 6,130ft above sea level. Time to rest and look
around and try and
take it all in. With the wind up here it was cold and hats and
coats were
definitely a good
idea!
 Humans were not the only creatures on the
summit! No idea what it found to eat up here.
 The views in every direction were
stunning.
 As they say, what goes up must come down!
The track descends very steeply from the summit,
down a very loose
scree slope to the Emerald
Lakes. Again, you can see more ants already on
their
way down. Once down this section, the track we have to follow flattens
out and can be seen
winding it's way
off to the
left.
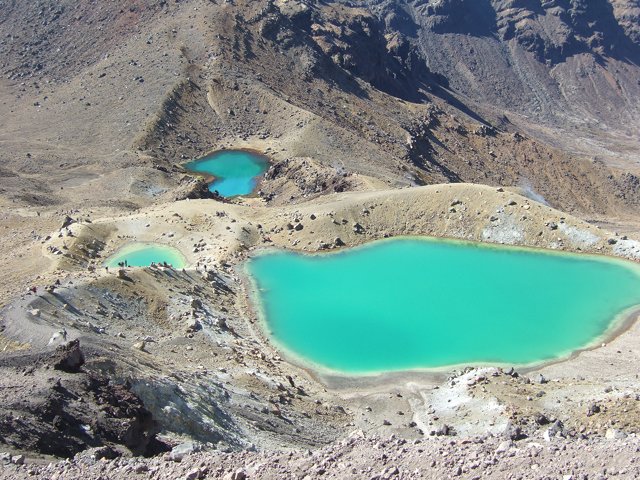
 The lakes are a stunning colour and bigger
than they look - compare with the people down on
the ridge above the lake to the left. The
brilliant colour is caused by minerals leaching from
the
adjoining thermal
areas.
 Liz on the way down the scree slope - it's
very steep, very loose and very challenging!
The best way to come down is to lay into the mountain side and be ready to
slide with each step. An alternative for the braver is to jump
and slide, jump and slide.
It's good fun and you get down quickly. If you try to walk down you need proper
alpine walking poles.
 The steep scree slopes come to an end as you
reach the 3rd lake.
 Looking back up from the first lake - did we
really come down that?!
 Looking across the Central Crater
that we have to cross. The track can be seen to the right,
going
across
the crater and winding
its way up the ridge to the Blue Lake that can
just be seen.
In the
foreground is a lava
field that flowed across most of the crater
before
solidifying.
 Climbing up the ridge to the Blue Lake and
looking back at the track we've come along. The
summit of the Crossing is the peak to the
right of Mt Doom. The track can been seen coming
down from the ridge above Red
Crater and across Central Crater, with the lava flow to the right.
 The Blue Lake. It's sacred to Maori and
you're not allowed to swim in it or eat food around
it.
 A last look across to Mt Doom before we
descend further and lose sight of it.
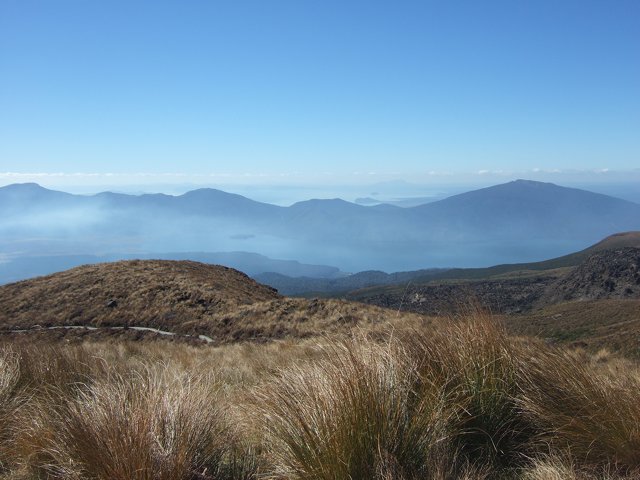 Looking towards the downwards track ahead -
it really is all down hill from now on! Lake
Taupo
and some of
its islands can
bee seen in the distance above the
mountains.
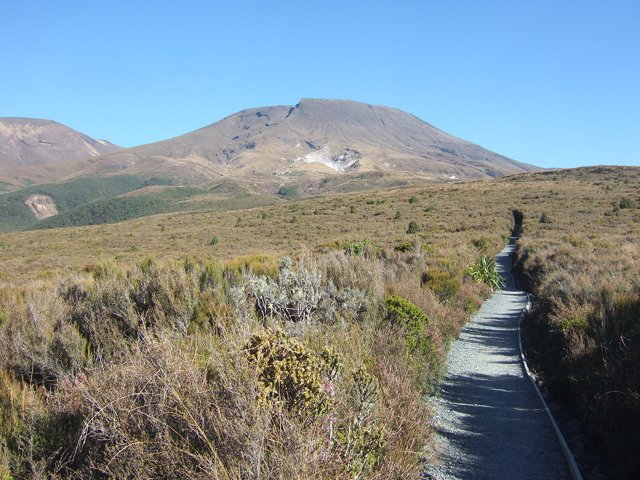
 Geothermal vents steaming near the track as
it sidles around the northern flanks of Mt
Tongariro.
 Looking back up from where we've come, and
still blue sky. This part of the track goes
through
private land and an area of fragile
soil and plants, and the paths have been well constructed,
including steps, to make certain that
trampers obey the rules and
stay on them.
 The track hugs the hillside as it zig zags
back and forth down the slopes.
 Approaching the tree-line, the track
disappears into the forest and it's a walk in the woods for the next hour. The
only problem with that is we couldn't see where we were heading
and had no idea how much further we had to go. For each of the last 20
minutes we thought the car park must be there when we go round
the next corner. And then it was there - we had done it! Wow! Tired, but
delighted. The car park was full of bodies lying flat out on the wooden
benches and tables, and on the grass, all taking a well earned rest while
waiting for transport to
arrive.
|