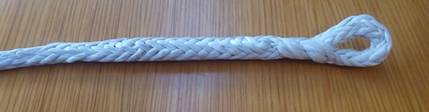
A Spectra Eye splice
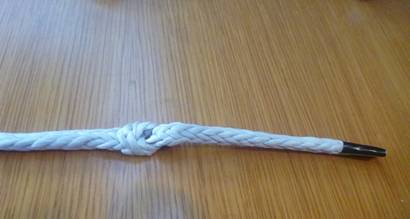
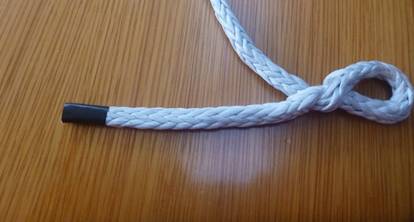
Saturday January 3rd, 2015 Jolly Harbour Marina, Antigua 17 04.2N 61 53.2W Today's Blog by David (Time zone: UTC -4.0) In conversation a while ago, a good friend observed that she would like to know how to make an eye splice in spectra. Needless to say, I KNEW how to do it and chivalrously offered to show her in due course. "Piece of cake" I believe I said. Well, for various reasons, it never happened. That's probably was as well, really, because a right numpty I would have looked in front of her as I tied myself into ever decreasing knots. The fact is I have recently had need to make such a splice for real ... and to be frank is has taken me about 10 hours to work out how to do it!! I know I have been unwell .... but really! So I decided to make a photographic record of it, with notes, so that next time I can remember how to do it. No better place to record it than here - for my future edification if not for yours….. The Objective
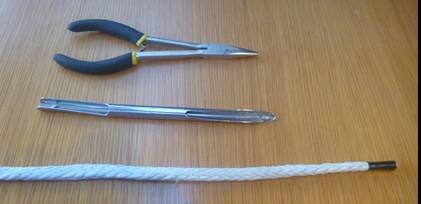
Materials You will need some pliers, a suitable fid and some spectra. You will find the spectra is very fine and individual fibres will catch on you and your tools. To minimise, tape the end.
Pep Talk I confess I do not find this process intuitive. I suspect you will need to do it several times before you become confident at it. At times you will look at it and think “This can’t possibly be right” (… and the first time you think so, you probably will be right (!) ….. but keep at it). Carefully compare your work product with the photo at each stage. The other point to make is that each step is easily reversible, so if you do it and decide to undo it, nothing is lost. (True, the spectra will get untidy, but it wont lose (much of) its strength. Top tip You will be pushing the spectra through itself. To make it easier at the point where you need to make a hole, grip the rope between thumb and fingers of both hands – about 3cm apart and push your hands towards each other; (it may need a gentle twist) the strands will open up thus:
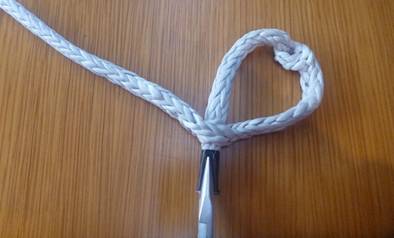
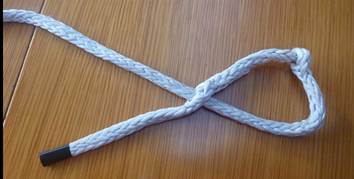
If you happen to have a bit of old spectra that has been around the block a bit it becomes quite soft and forgiving and easy to undo. New spectra is quite stiff and unforgiving so not good to practice on. Making the First Hole Gently push your pliers through the middle of the open latticework of threads and grasp the taped end. Pull the taped end right through the rope, thus:
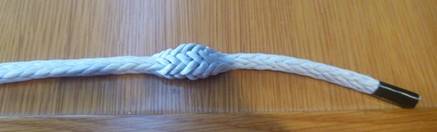
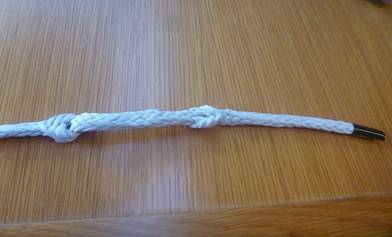
The tail of the rope between this new hole (the ‘first hole’) and the end ultimately provides a great deal of the strength of this splice; generally the longer, the stronger, so don’t stint on it; if it proves too long you can cut it off later. I will return to this at the end. The Second Hole Repeat this exercise “further along” (i.e. further away from the taped end) the rope, this time drawing the first hole through the one you are now creating (the ‘second hole’) .
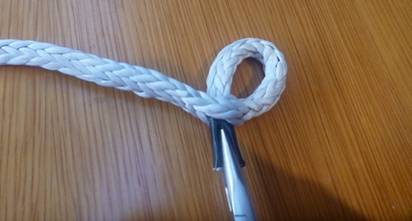
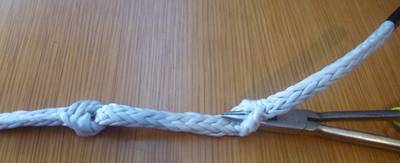
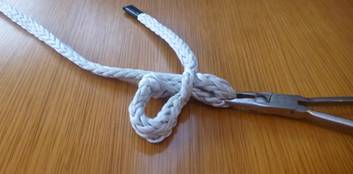
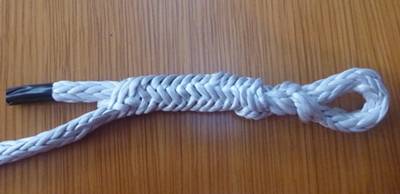
How much “further along”? It will become evident later that the distance between the two holes (shown right) defines the size of the ultimate splice eye; so (errr, perhaps next time, now?) take the opportunity to size the loop to your purpose. Look carefully at the two holes. You can see clearly above the way the body of the rope is twisted on itself and emerges from the left hand (the second) hole – the right hand (first) hole is exactly the same but the strand emerges underneath in the photo. Making the splice You will undo that twisting as you make the splice in the next two steps. Insert the pliers through the first hole as shown below.
Grasp the rope, at a point beyond the second hole, and pull it all back through the hole were the pliers rest above. It may help you to look carefully at the twist in the rope here before you start; the next process should untwist the lay-up of the rope.
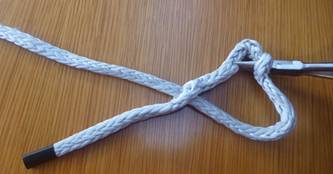
You will see that the rope is no longer twisted around the first hole; the lay-up is normal again. If it is double twisted (it does happen – to me at least) you have inserted the pliers from the wrong side of the hole! Now to create the locking turn. Insert the pliers through the second hole again with a view to untwisting the lay up in the second hole. Grasp the rope close by:
Pull the rope back through as shown, and relax! (Again the layup should be normal – if it is double twisted you have come at it from the wrong side).
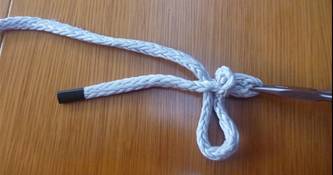
If you give this a good tug it feels really quite secure at this point - and for most purposes, it is – but it relies for its strength on the weave of the rope that will in time unravel. Burying the evidence So you now need to bury the tail in exactly the same way as you do an eye splice in braid:
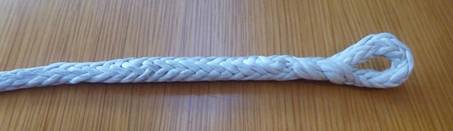
Cut the tape off and taper the tail before drawing it back into the body of the rope. Roll between your hands to smooth it out: Job Done!
The real strength in this splice relies on the body of the rope gripping the buried tail in just the same way as in an eye splice in braid. So within reason, the longer the better and if you leave too much at the start it can be cut of at the end (but of course you cannot add if you did not leave enough to start with! In REALLY SERIOUS applications you may find riggers reinforce the grip of the rope on the tail with a straight forward whipping; where they do it is just below where the tail is buried back into the lay-up. The other reminder is that the ultimate size of the eye is governed by the distance between the two holes. |