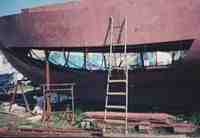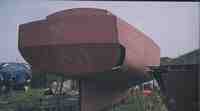
Deck and Super Structure
Next on
the list was the deck plating and the superstructure. The first problem to
solve was how to get the deck plates up 14 feet to the deck. Again no sky hooks
available so muscle power had to do. Steel Kit were tasked to design the size
of the plates around a one man operation but the size of the coach roof plates
got me a little worried. They were big around 3 meters by 2 meter. They took
some shifting. Getting all the plates, four coach roof plates, ten cockpit
plates and twelve walkway plates took three weeks to place and tack weld in
place.
Then the biggest shock ever, the port side walkway plates were to short so it
seemed as there was a gap aft where no 3 plate joined with the transom plate.
Steel Kit did not want to know they said if all the measurements of the frames
and stringers were correct then the plates should fit. They were willing to
check plate sizes to CAD so I measured the plates. There was no difference
between the CAD Data and the measured plate. All were correct. A lot of neck
scratching followed. Questions like is the keel warped? Was the hull bowed?
What had I done wrong? No one knew. In the end I decided it was a build up of
tolerance issue. All plates, frames, stringers had a design tolerance of +/-
1.0mm and my conclusion was that the 10mm gap was caused by a build up of these
tolerances along then length of the hull. So the gap was filled and forgotten
about.
Next the question of the companionway hatch. The drawing stated that it should
be in the centre of the forward cockpit bulkhead but Ann and I had not decided
which type of rig we would have. To explain, in her book "Voyaging on a
small income" Annie
Hills had raved about
Junk Rig and how good it was for short handed sailors. In fact her yacht
“Badger” was junk rigged and her book gave me a good insight into
sailing with this rig. I was not totally convinced about it though and it took
many phone calls and a weekend at the Junk Rig Association annual rally to
convince me. We went sailing in a junk rig yacht and I was very impressed. All
the lines are led back to the cockpit. No climbing around on deck, no sail
changes and no storing large sails down below to mention but a few pluses for
this ancient well proven rig. Many people will be mumbling about windward
performance etc. so later I will be devoting a full page on this subject.
I commissioned Sunbird Marine who specialise in the design of Junk Rig yachts
and Rigs to convert our ketch sail plan to a schooner junk rig sail plan. Cost
for this conversion was £800 and within a few days I knew where I could place
the companionway hatch.

Plating continues
Ruffles Spray was beginning to take shape
although the plated hull was only tack welded it looked like a boat. Next came
the question of welding up the hull. There was no way I could use the generator
I bought to do this as it was a petrol one and used more than three litres an
hour so I shopped round and found a company which hired large generators and
welders. I hired a 350 amp mig welder and a 12kva diesel generator for three
weeks. But before I could start welding the boat had to be covered so that the
welding gases would not be blown away causing all sorts of problems. I
therefore built a shed made out of wood. The frames were bought and erected
then old lorry tarpaulin was stretched over the frames and nailed in place this
took two weeks. The generator arrived on time, it was huge, see picture in
photo album, argon gas bottles were hired and the welding could begin. As I
have said before Bruce Roberts the designer advised me to weld the hull inside
and outside so I started inside. This exercise took two weeks. I then ground a
vee back into the weld from the outside and the whole welding process began
afresh, again this took two weeks but hiring the welder and the generator saved
a lot of time as if I had done it by stick welding I would probably still be
there now.
So the hull was completely welded from the inside and outside. There were no
windows cut, in fact there were no openings at all so these came next. Windows,
openings for the lazarette lockers, holes for through hull fittings, all the
various small holes for cables, engine exhausts, water intake etc. were all
cut. By this time it was September 1999 and I was beginning to think that I
would never complete the build. I was now also working full time on Spray and
things started to happen.


