Crotone: Wanda's all Shook up!
39.05.013N 17.08.023E Since we left Marina di Ragusa we were having more and more vibration problems. We decided to get lifted in Crotone as we knew the boat yard. It also meant we could give Wanda a quick scrub. We hoped something was wrapped around our propeller, but this wasn’t the problem. To fix the problem, we wanted to replace the cutlass bearing and check the shaft was straight. At the same time we decided to replace the old shaft clamp we knew had seized on the shaft.
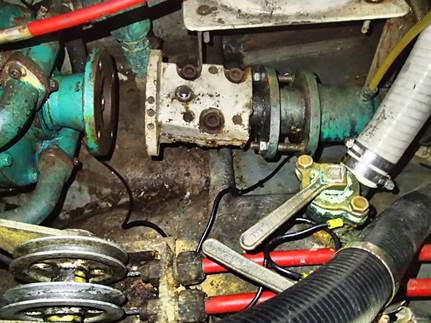
The white “blob” of metal is the old shaft clamp.
A few hours with an angle grinder and it was off
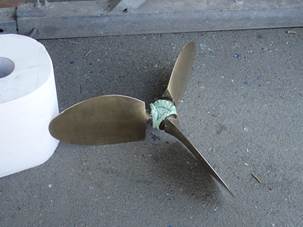
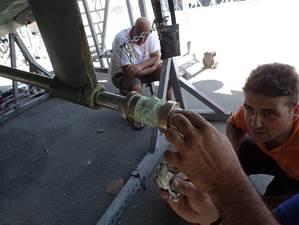
Then the propeller was removed. We have a “fancy” folding max prop that comes apart. The internal condition of the gears are still excellent. The last picture shows the shaft going through the cutlass bearing.
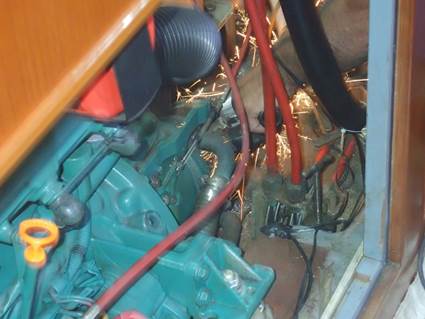
We also removed the packing gland (the bit that stops water entering the boat). We were then left with just a hole in the boat where the shaft enters. Finally we could examine all the parts.
The shaft was straight (good news) however it had badly worn on the cutlass bearing and the packing gland. To make matters worse it had been turned down to 3 different diameters over its life. A new shaft was needed. The boat yard tried to convince us 38mm is the same as our old 1.5” shaft. Although it was tempting to let them have the responsibility to make a new shaft, we knew it would cause lots of problems in the future. We then spent a couple of days investigating the world of shafts. We had an imperial shaft with a 1:10 metric taper for the propeller. We spent hours…and hours…and hours measuring the shaft taper to 1/10th or 1/100th of a mm if possible, checking the thread pitch and size of key needed (brass bar that fits in the slot and a corresponding one on the propeller). Finally we investigated different types of stainless steel and decided upon F51 Super Duplex as it gives the best corrosion protection (and is the strongest). We also decided to replace the old packing gland (that is designed to drip) with a dripless system. As this system gives less support to the shaft we then had the engineering firm in the UK calculate (based on engine HP, max revs and gear box ratio) how long between supports our shaft can have. In summary we are fine (on paper!). Did you know you can send a long thick 20Kg stainless steel bar by air next day delivery using DHL for £98…we do now! In the mean time we tried to be productive on boat jobs (fitted new stainless support to bimini, serviced seacocks and renewed earthing wires, painted engine room around part with no shaft, fitted a pipe from an old seacock for sending water to cool the new seal (more about this below) and finally we removed (most) of the old treadmaster (ie the bits on deck that don’t have teak deck) in preparation for re-painting. This last item was a long job as we had to remove all the old glue and make the surface smooth ready to repaint with non-slip paint (paint with beads in it) – its ok the irony was not lost on us too. We tried to have a bit of fun as well. Our main sport was tracking DHL parcels for all the spare parts we needed. We also managed to eat out a few times and met up with people from MdR for a drink. One boat owner hired a car. On coming back to the marina they found a stowaway kitten. He has since been adopted by the boat yard and named Charlie. Yoyo donated lots of food to the “starving” kitten. The local Ferrari owners club had some time trial racing on the road just outside the boat yard – a noisy but fun afternoon!
Finally the shaft arrived 4 days later – not exactly quick. The reason was the company shipped it ground not air. They did refund the difference on the transport. We then noticed the key on the shaft clamp end was the incorrect size. To be fair they did make a new key the same day and air shipped it out. It arrived 2 days later.
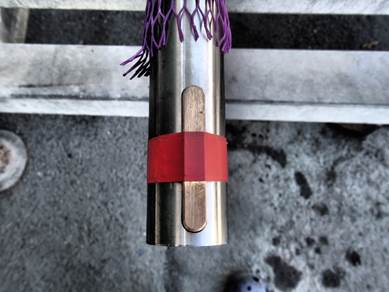
The shaft key is a brass piece of metal that sits in a cut out of the shaft and an equal cut out of the shaft clamp. The key helps transmit torque and stops the two components spinning
At last all the parts were ready for installation. We fitted (from left to right) a new flexible coupling, shaft clamp, PSS seal (silver disc and bellows) and a new cutlass bearing
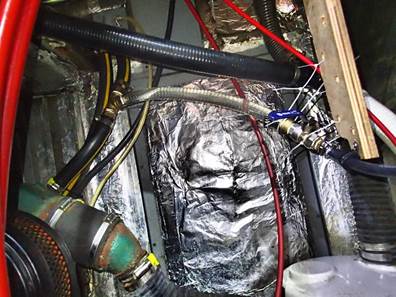
It took about 3 hours to assemble the parts. The engineer compressed the bellows by 1cm but we increased that to 2.5cm as this is what the instructions stated. We even rang the company in the USA who stated it would be dangerous to only compress them 1cm as it could leak under high speeds or heavy seas. We cooled the coupling with a line taken from a spare sea cock (black pipe not yet fitted in the picture). And then we launched…..now the adventures began L We had problems where the PSS seal was sometimes, not every time, overheating - a sign of lack of water. To cut a long story short, it took 10 days and lots experimentation to determine the issue. Our 1.5” shaft enters through a hole 1.51” diameter. In conjunction with our folding propeller that in reverse changes pitch 180 degrees, means we can sometimes suck water or push air bubbles up the shaft. Hence the only solution that works in these circumstances is to connect the PSS seal to the raw water pump of the engine, which guarantees a supply of water. We did this and then motored for 30 hours to Greece – at the end it was still cool and we could travel at 7 knots again. Problem fixed. That only took 6 weeks, £2000 and the best part of our summer.
We have T-‘d of the engine after the anti syphon valve (clear pipe)and rigged a temporary route for the line to the PSS (including a bracket of wood to support the valve). We will re-route this over winter to make a more professional installation. Our aim here was to do enough to get going! |